How to Edit an Image in a Website's Image Library

4 years ago, Updated
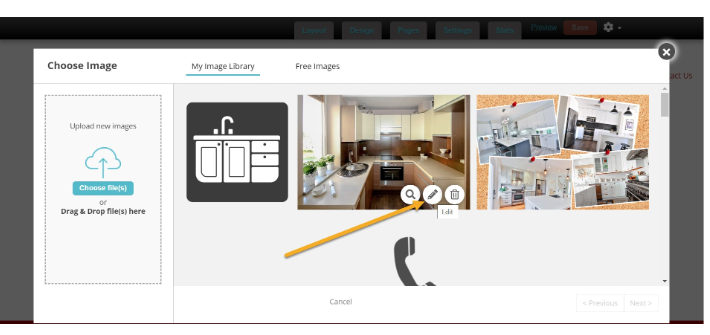
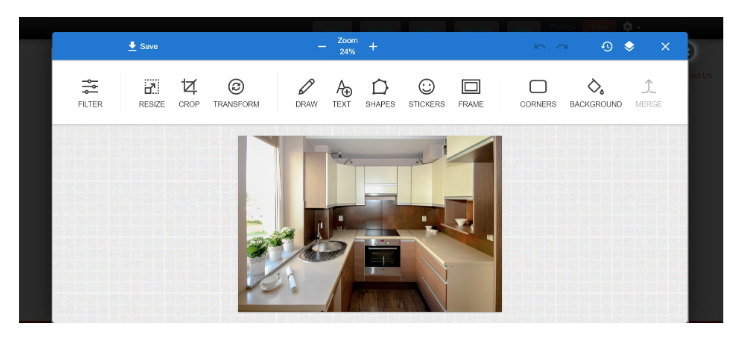
Back to Modules in this Section


The AWF image editor is a powerful tool you can use to customize an image that's in the Image Library of a AWF website.
STEP 1 - Click the pencil icon to edit an image
Awf sp 1002


STEP 2 - Choose the editing option you want to use from the menu that appears.
Awf sp 1003

Editing Options

 
Zoom: Zoom in or out to change your view of the image.
Undo/Redo arrow icons: Undo or Redo the last edits made to the image.
Version history clock icon: Restore the image back to a previous version of itself.
Filter: Change the color tone of the entire image.
Resize: Change the size of the image in pixels or by percentage.
Crop: Select a portion of the image to create a new image.
Transform: Invert or rotate the image.
Draw: Use your cursor to draw on the image.
Text: Add text to the image.
Shapes: Add common shapes to the image.
Stickers: Add small graphics to the image.
Frame: Put a frame around the outsides of the image.
Corners: Change the corners of the image from square to rounded.
Background: Add background color to an image with a transparent background.
Merge: Permanently adds changes you make to the image.

Important Notes
  • Click "Apply" to save each change you've made.
  • Click "Save" to save all of the changes you've applied, then wait for AWF to create the new image, after saving, a new image will be created and placed on the top row of the Image Library.
  • For best results upload images that are 1 MB or less.
     

Edit an Image in a Website's Image Library

Let's see what you've learned. Take the Quiz.

Please complete the quiz below after reviewing the module. Your results will be displayed 30 seconds after submission. You may retake the quiz to improve your score.
Take Quiz